A DataSherpas Quick Tip.
In this quick tip we will show you how to rotate text in Excel. The process is very simple and quick, but we are sure that you will use this feature regularly to style and format your Excel spreadsheets.
In our example below we have a large cell containing data and to the left of that cell we have another cell that we want to use as a heading or title for the data so the end user of the spreadsheet can quickly see what the data relates to or what is important about the data.
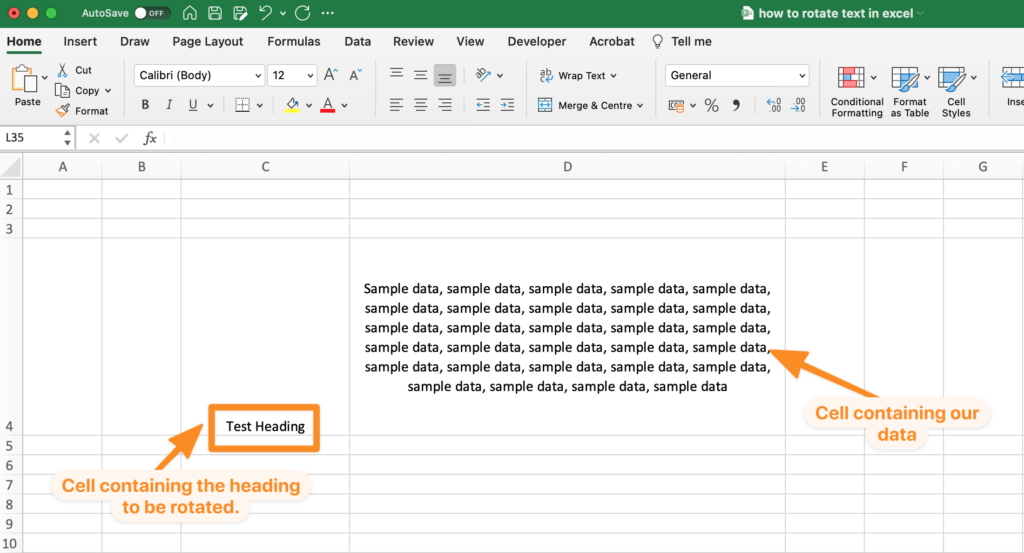
At the moment the heading looks a bit strange in the default position. It would be better if this heading were rotated vertically and aligned properly so it catches the eye a little more and improves the overall formatting of the Excel spreadsheet.
First let’s rotate the text in the heading cell so it is presented vertically from top to bottom.
There are many routes available in Excel to achieve the same result. We will demonstrate our preferred method below and then list the alternatives.
Rotating Text Vertically
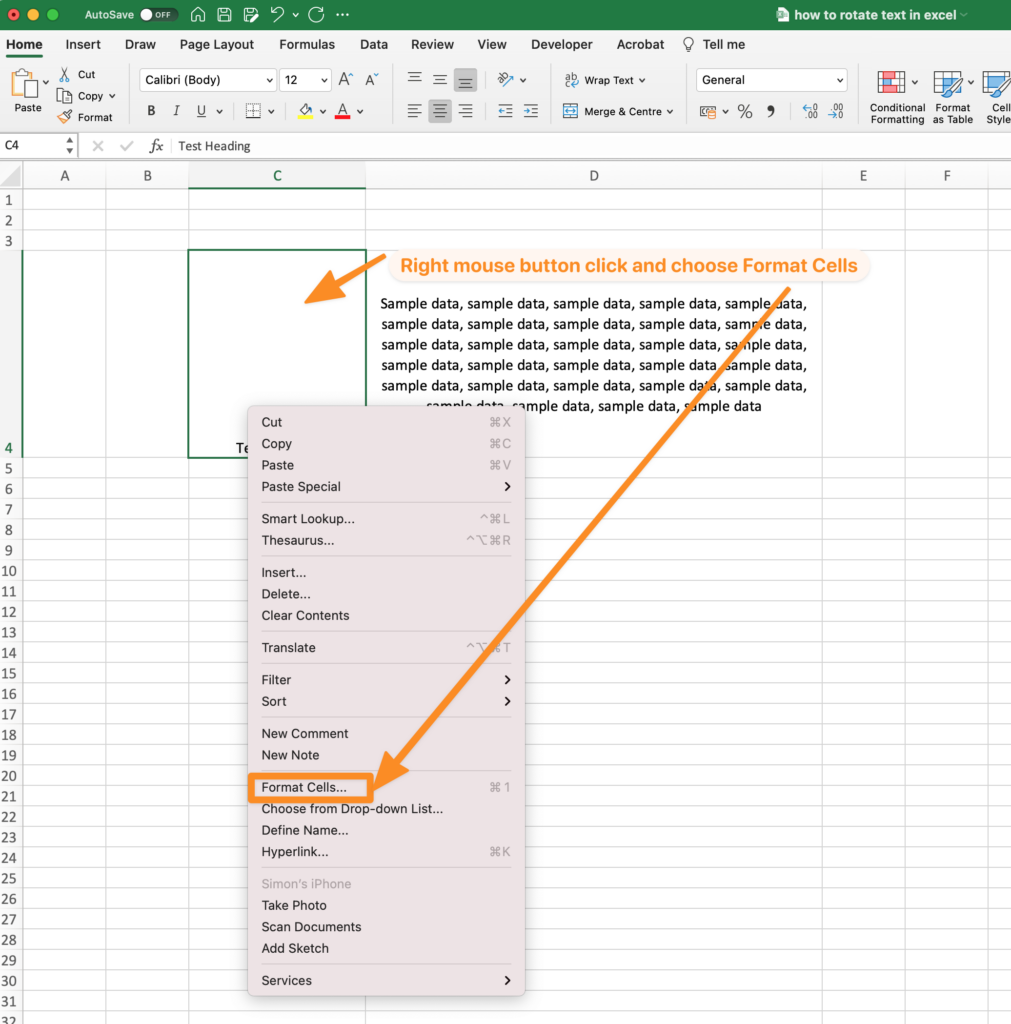
First click in the cell where the text is to be rotated.
Now click your right side mouse button and choose “Format Cells” from the menu.
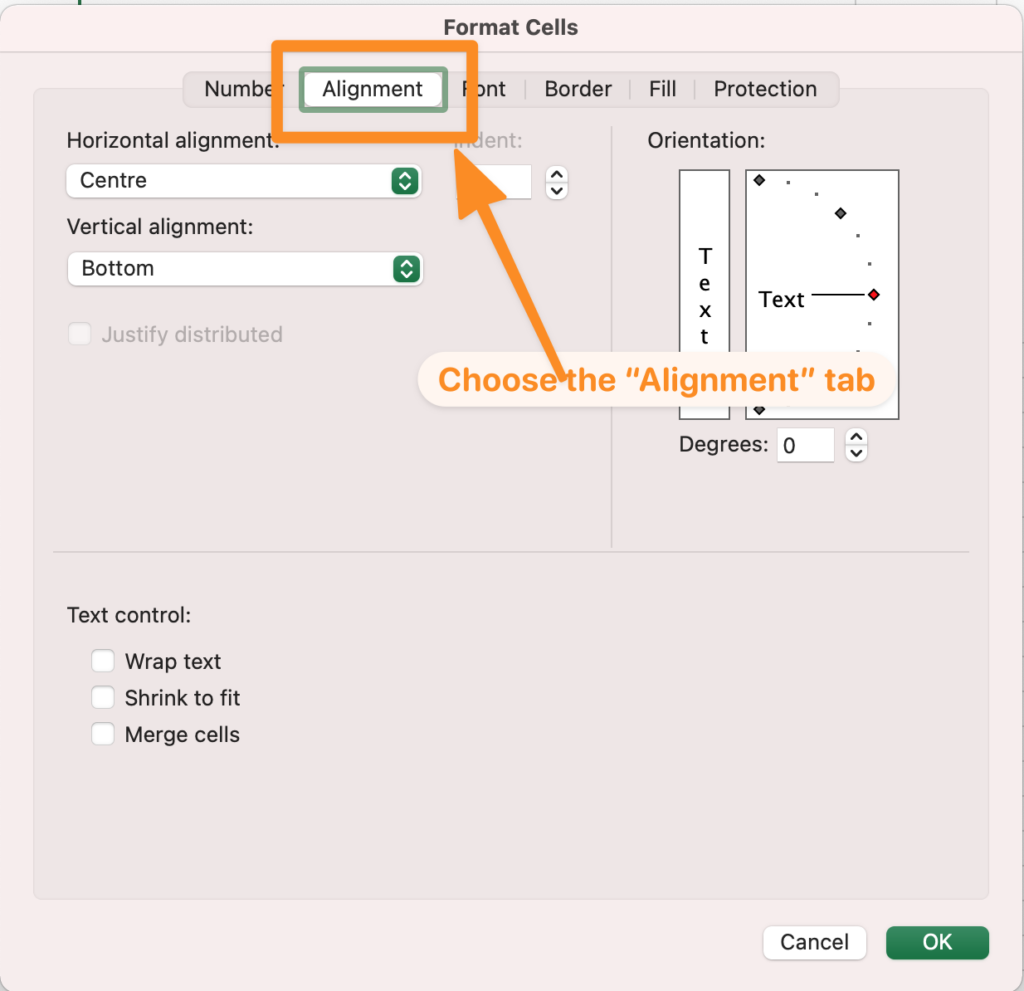
In the dialogue box that appears choose the “Alignment” tab.
Next click on the box labelled “Text” under the “Orientation” panel. The text box should change color to green.
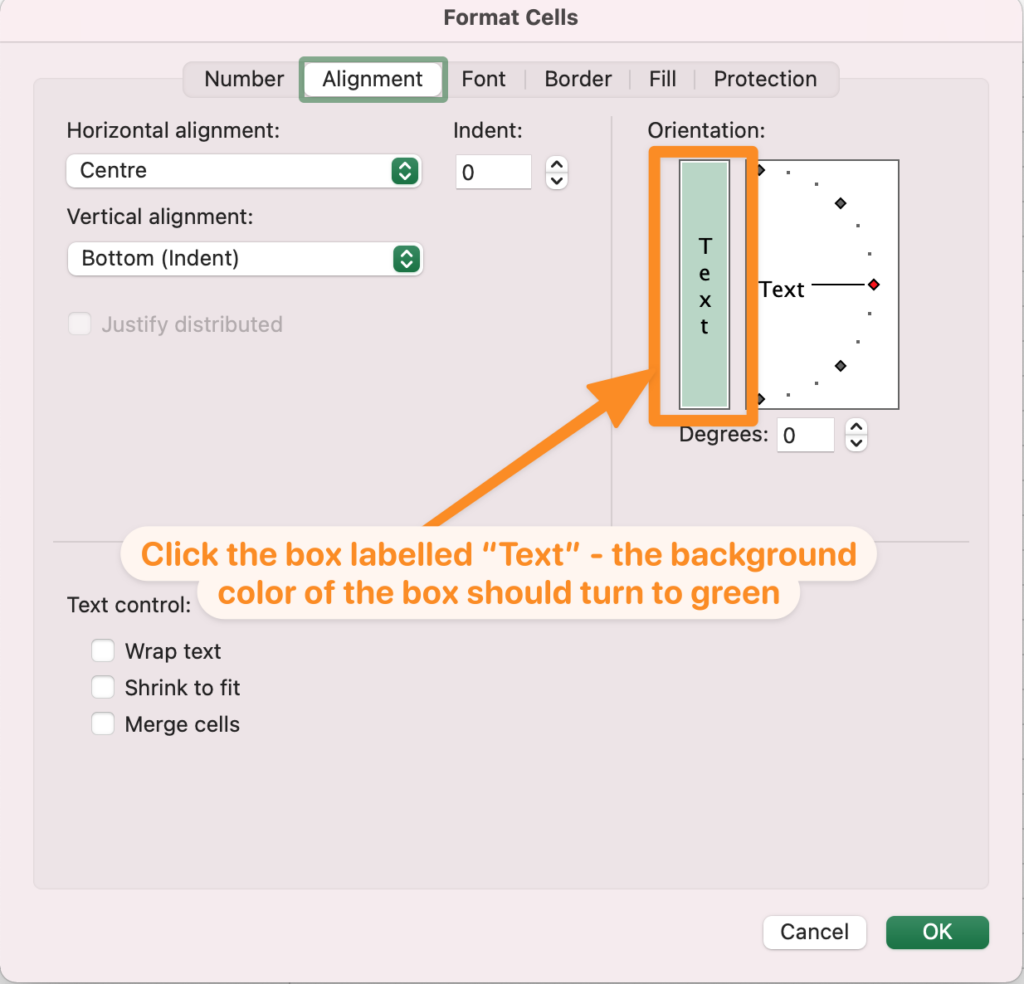
Next click OK.
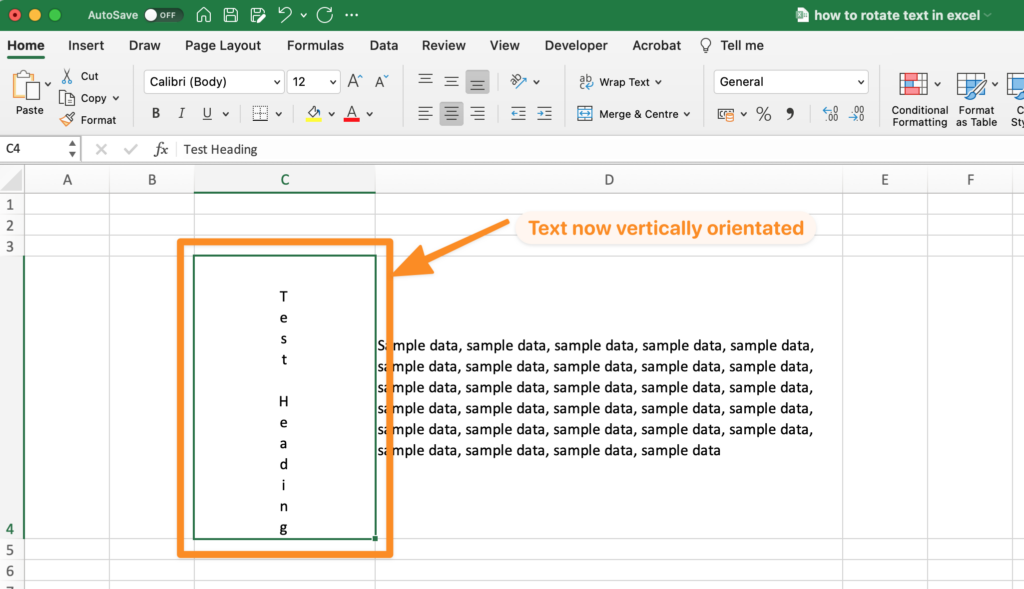
The text in your cell should be vertically orientated.
As we mentioned above there are a couple of other ways to achieve the same result:
- Click in the cell where the text is to be rotated, then go to the “Format” menu at the top of Excel, then choose the sub menu option “Cells”.
- Click in the cell where the text is to be rotated and then choose the “orientation” shortcut from the Excel ribbon / toolbar:

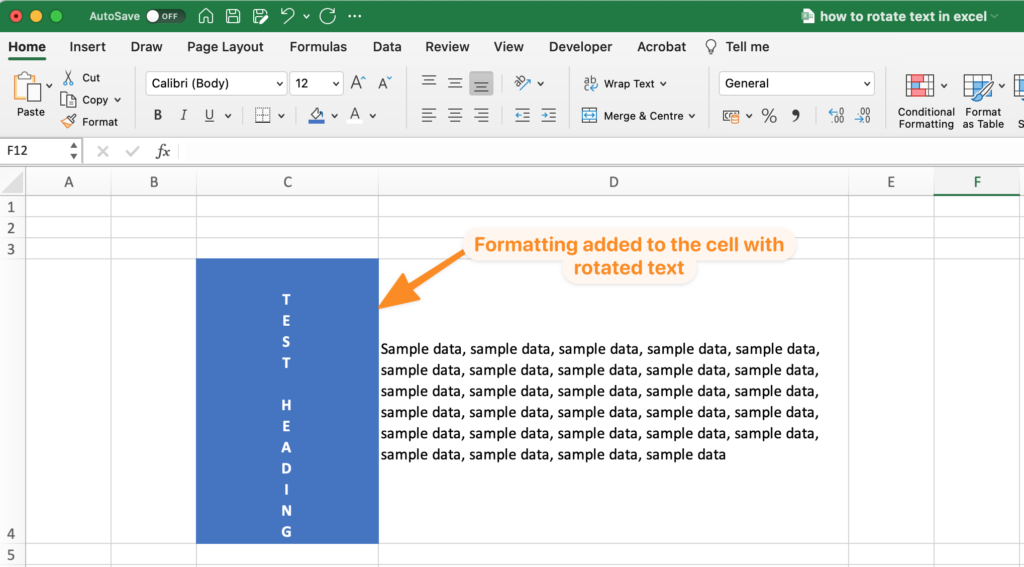
Now you may want to improve the styling of the text that has just been rotated.
Maybe capitalise the letters, change the font color, add a background.
Also try aligning the text horizontally and vertically in the cell.
Rotating text to other angles
You may have noticed you can also change the orientation of the text in your cell to be at differing angles, not just vertically.
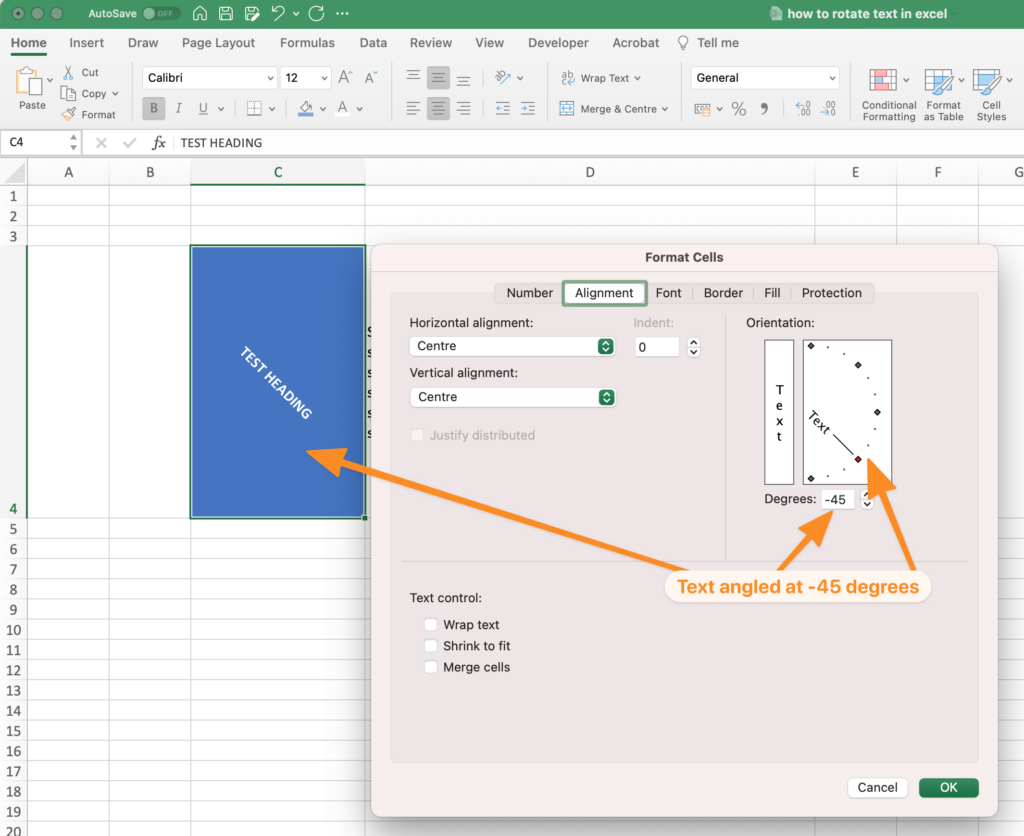
Let’s say we want to angle the text in our cell at 45 degrees.
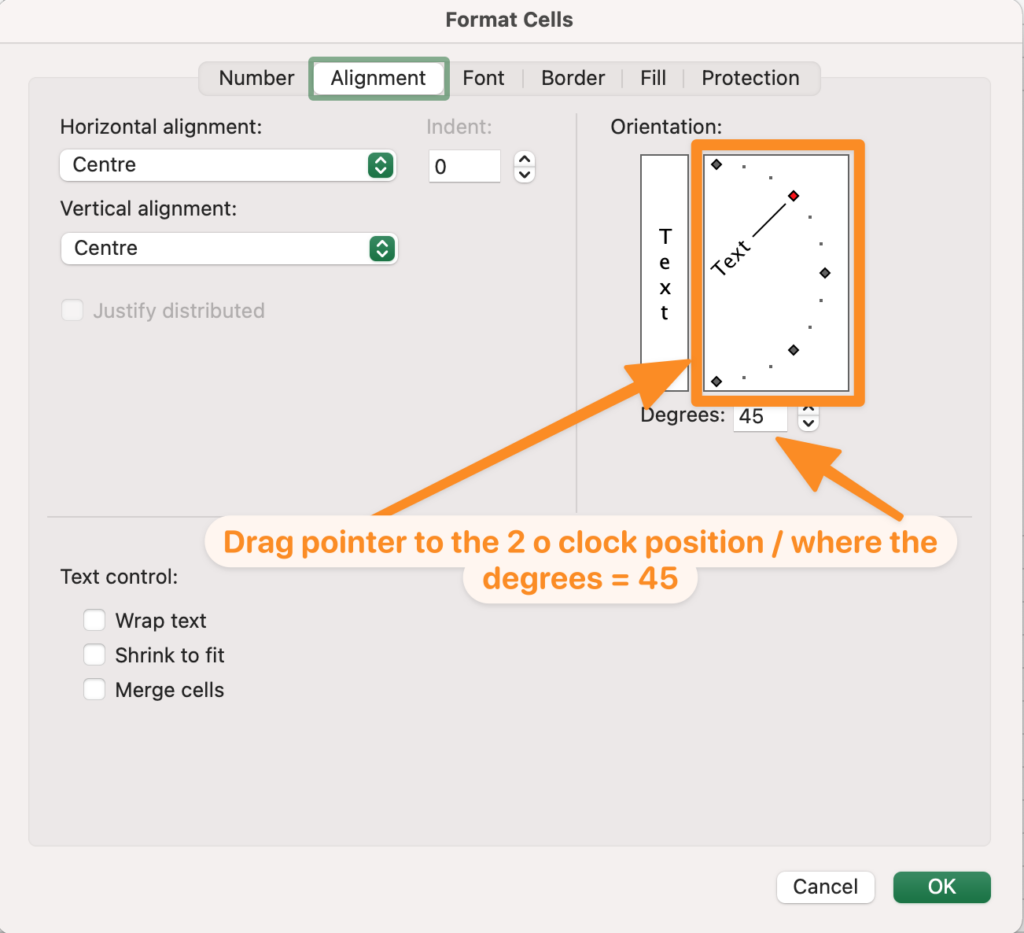
Click your right mouse button again and go to the “Format Cells” option.
Now instead of clicking in the “Text” box in the orientation section, click on the dial (to the right of the text box) and drag the pointer to the 2 o’ clock position of the dial and click OK.
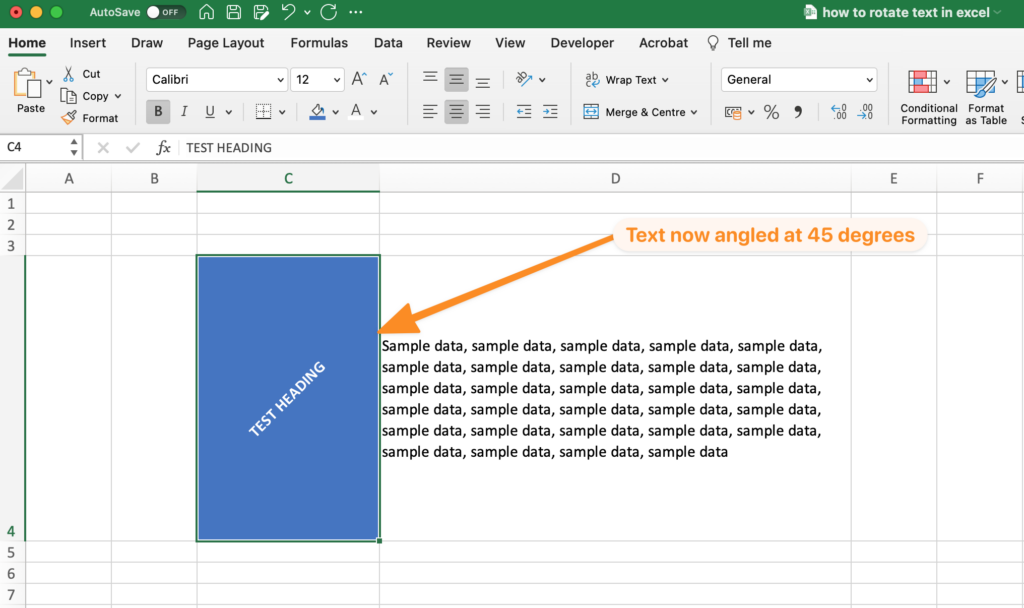
The text in your cell should now be angled at 45 degrees across the cell.
Of course instead of dragging the pointer to the 45 degree angle you can type the specific angle into the “Degrees” box.

You are not limited to just 45 degrees. Have a go at experimenting with other angles and even negative numbers to have the text angled downwards.
You will see, with some experimenting there are a great deal of options available.
Other Resources
- Our Youtube video explaining the process for rotating text in Excel.
- Official Microsoft help pages on rotating and aligning text in Excel.
———-
We hope you found this quick tip useful, rotating text in Excel really can make a world of difference in the presentation of your Excel spreadsheets.
If you have any questions, or need any more information, please do let us know. Leave a comment below or contact us via our contact form.
———-
Notes: We use Microsoft Excel for Mac version 16.5.8 to produce this quick tip guide. If you are using other versions of Excel the location of shortcuts or menu options may vary slightly but all of the functionality we have described is available in all current Excel versions.