How to add columns in Google Sheets
A DataSherpas Quick Tip.
In this quick tip we show you how to add columns in Google Sheets. It’s a really quick process and will take you just a few seconds if you are adding one or multiple columns. Let’s get started.
So you have your Google Sheet. You want to add an extra column of data. In our example below we have a sheet containing sales data. We want to add an extra column after the Product column so we can add a description next to the product name.
(You can obviously add columns for any purpose this is just an example).
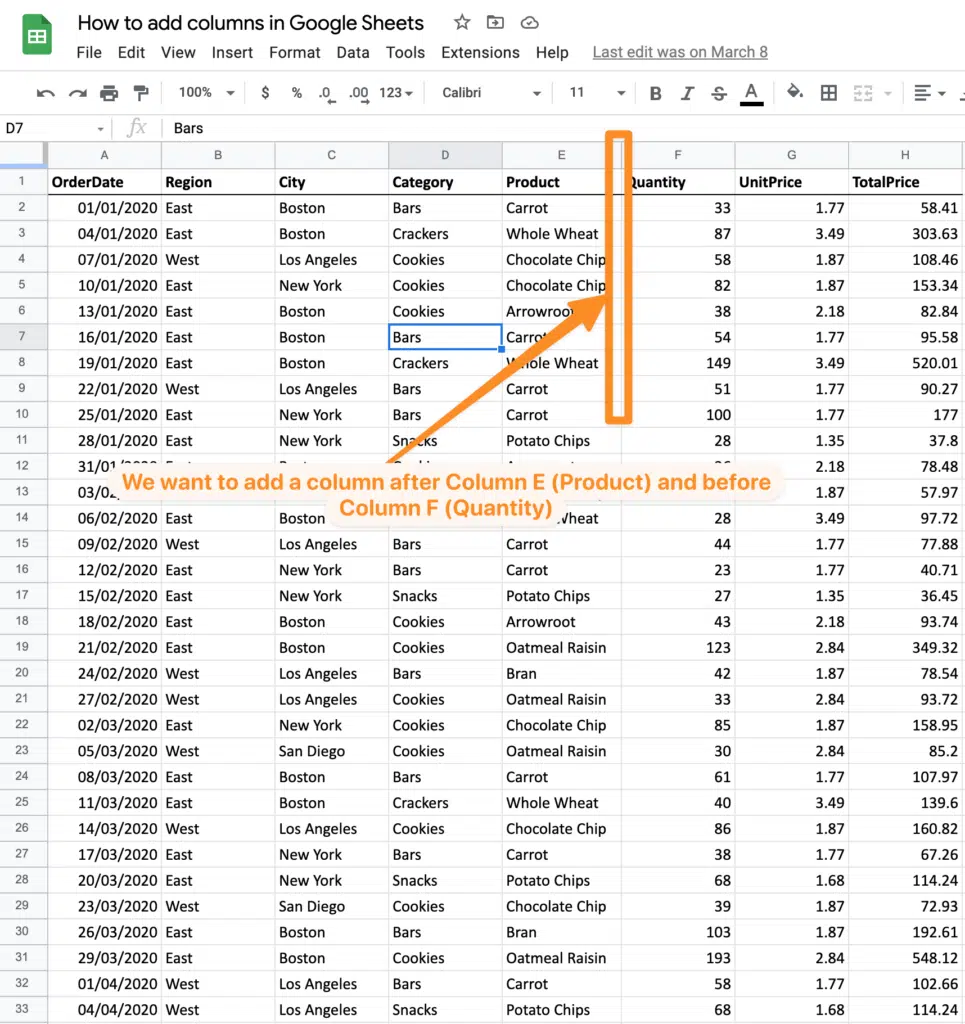
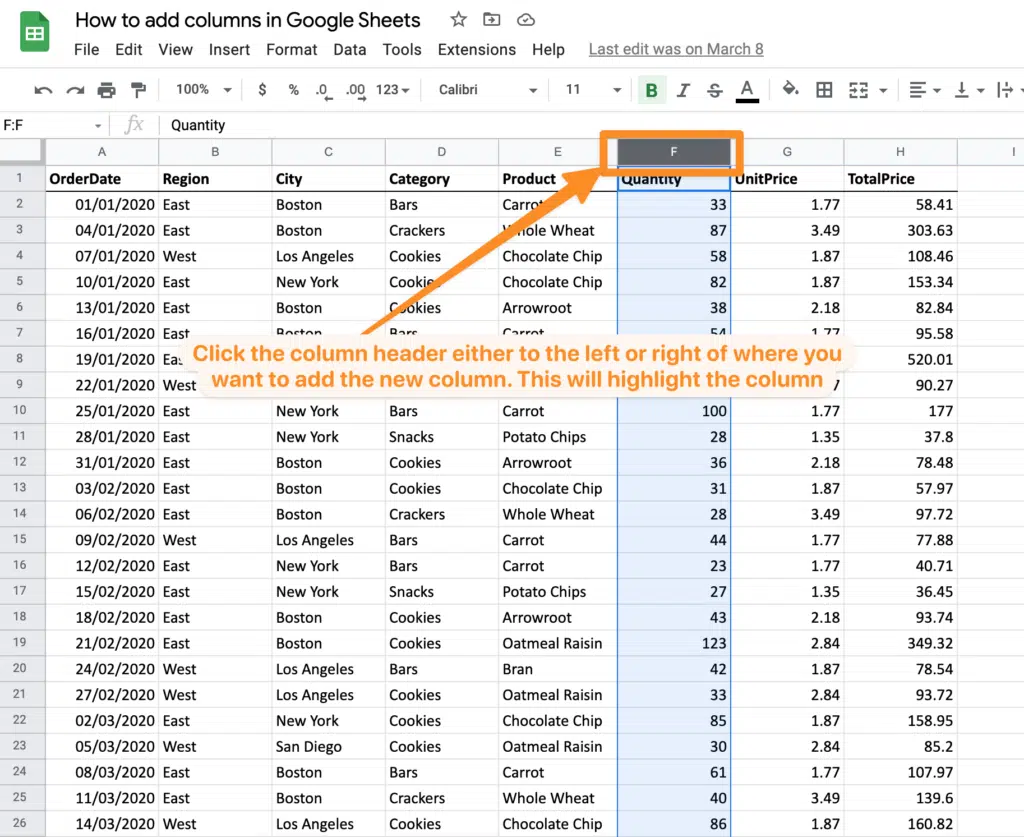
To start the process for adding a column highlight either the column to the left or right of where you want the new column to be placed. It does not matter if you choose the column to the left or right, either will work.
To highlight the column click on the column header. In our example we are clicking on column F and we would like to add a new column to the left of that column.
Next with your right mouse button click in the header. You will be shown a menu where you can choose to insert a column to the left or right of the column you have selected. Choose the appropriate option for your needs.
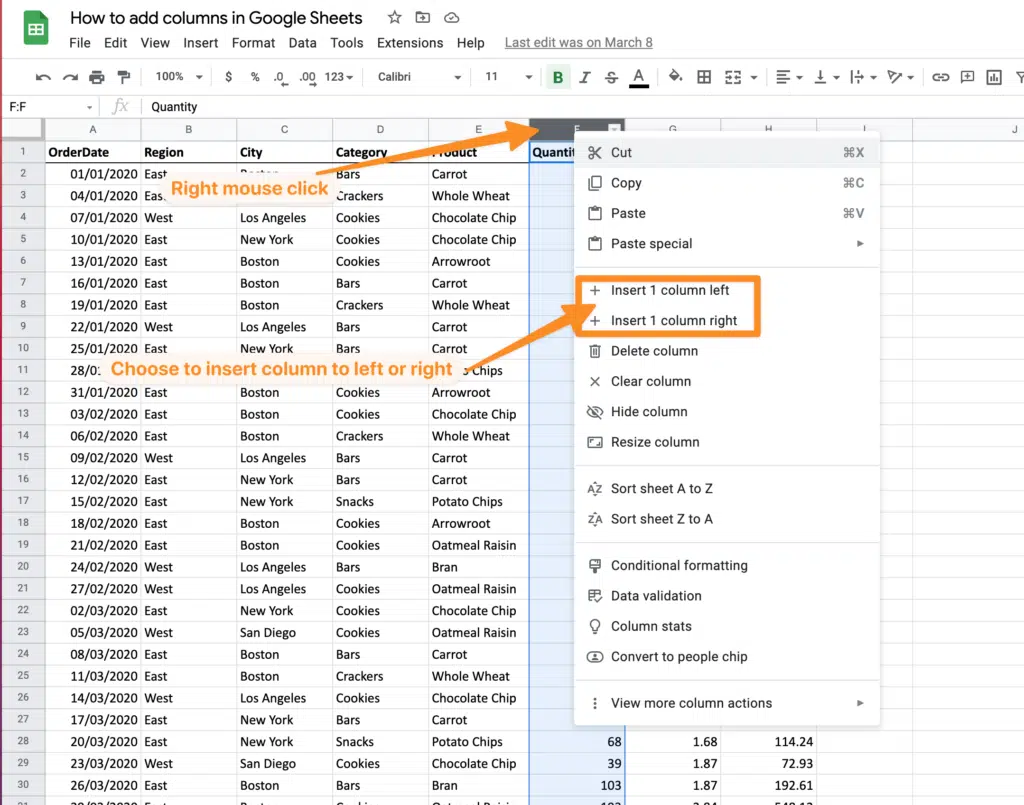
In our example we will choose “Insert 1 column left”
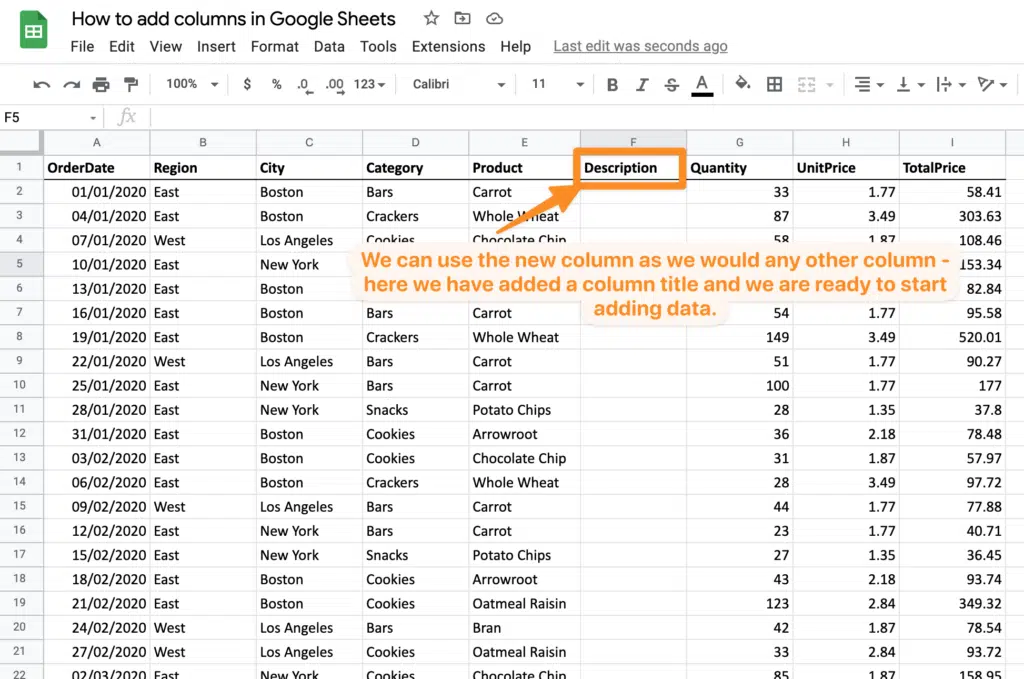
The new column has been added. You will also notice that the column headers have been updated and the new column has the correct column header for its location in the Google Sheet.
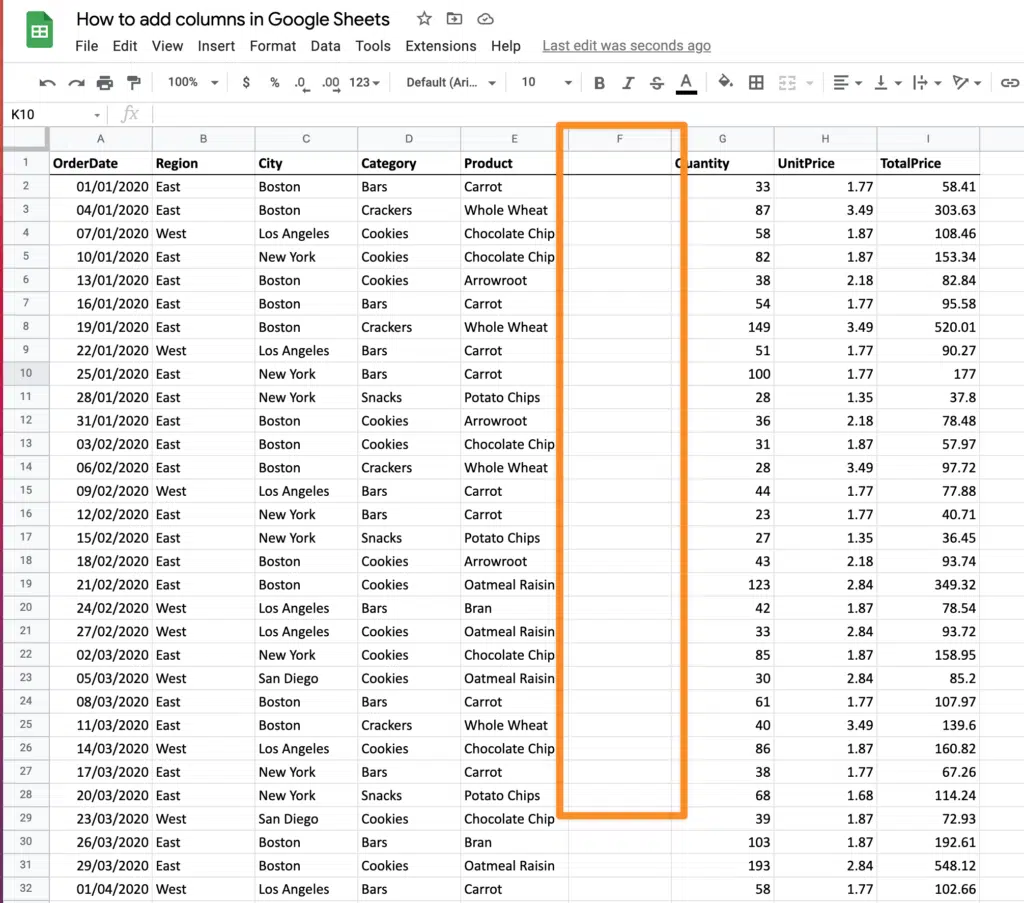
Now you can use this new column as you would any other column in Google Sheets. We want to use it as a description column, so we give the column a new title and we are ready to populate the data in that column.
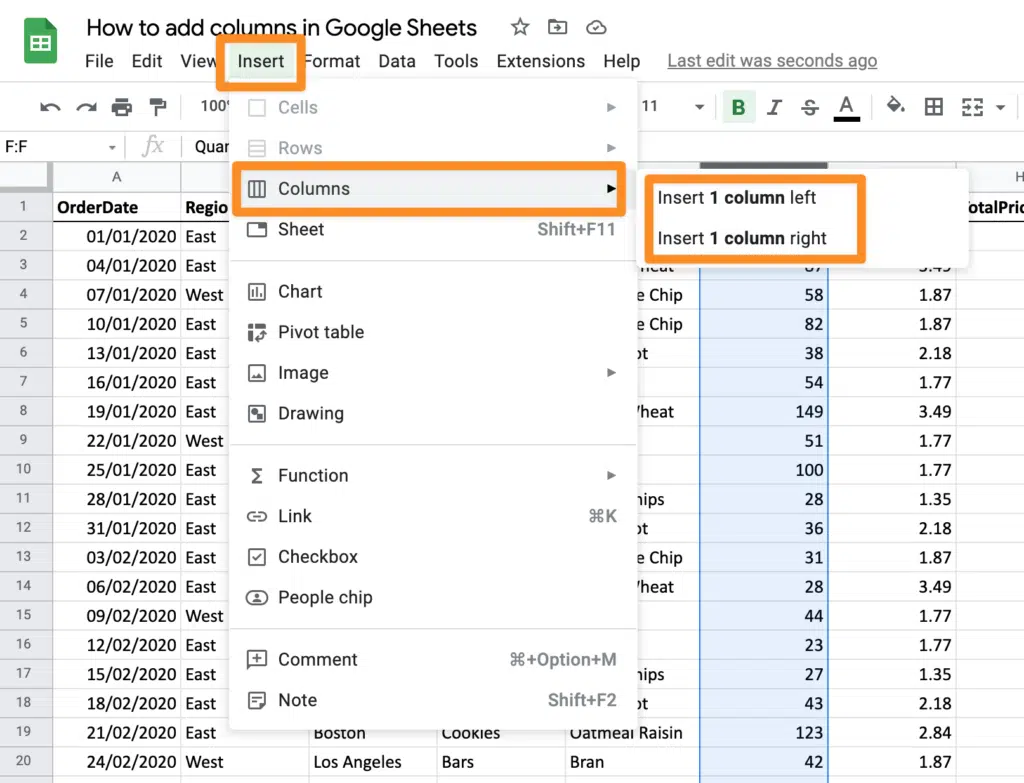
You can also use the Google Sheets menu to add columns (instead of right clicking your mouse on the column header).
Select the column either to the left or right of where you want to add the column by clicking on the column header.
Then, with the column highlighted, go to the Insert menu at the top of Google Sheets. Now from the sub menu choose Columns, and then choose either Insert column to the left or right (depending on your requirements).
Adding multiple columns to Google Sheets.
Adding multiple columns is also very easy.
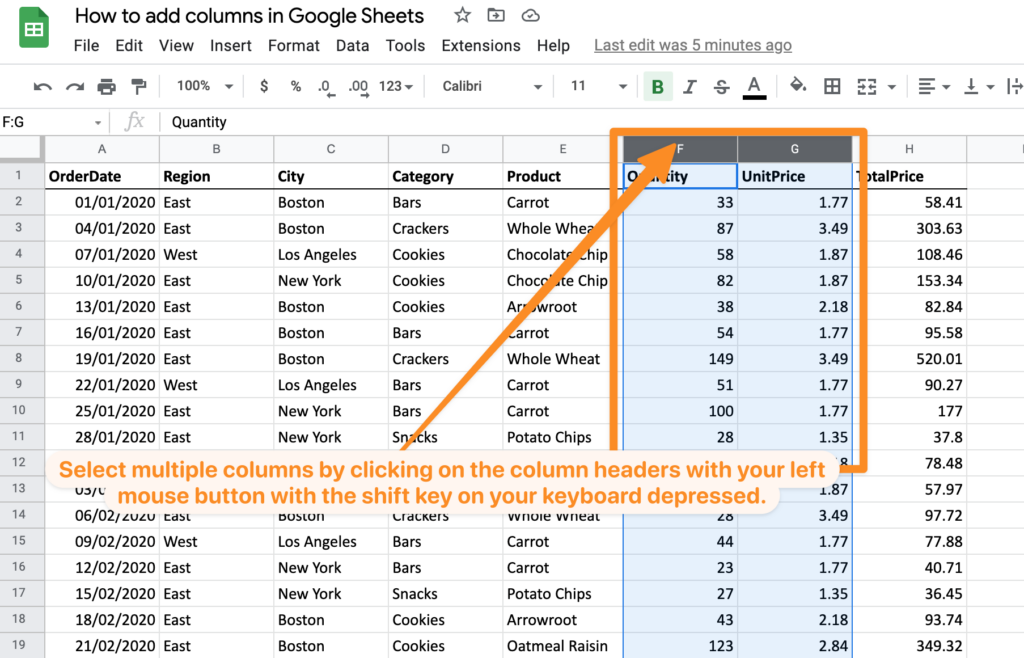
You follow the same process but instead of selecting one column to the left or right of where you want to insert the new column, you select multiple.
Select one column by clicking on the column header. Now with the shift key pressed on your keyboard select another column next to it.
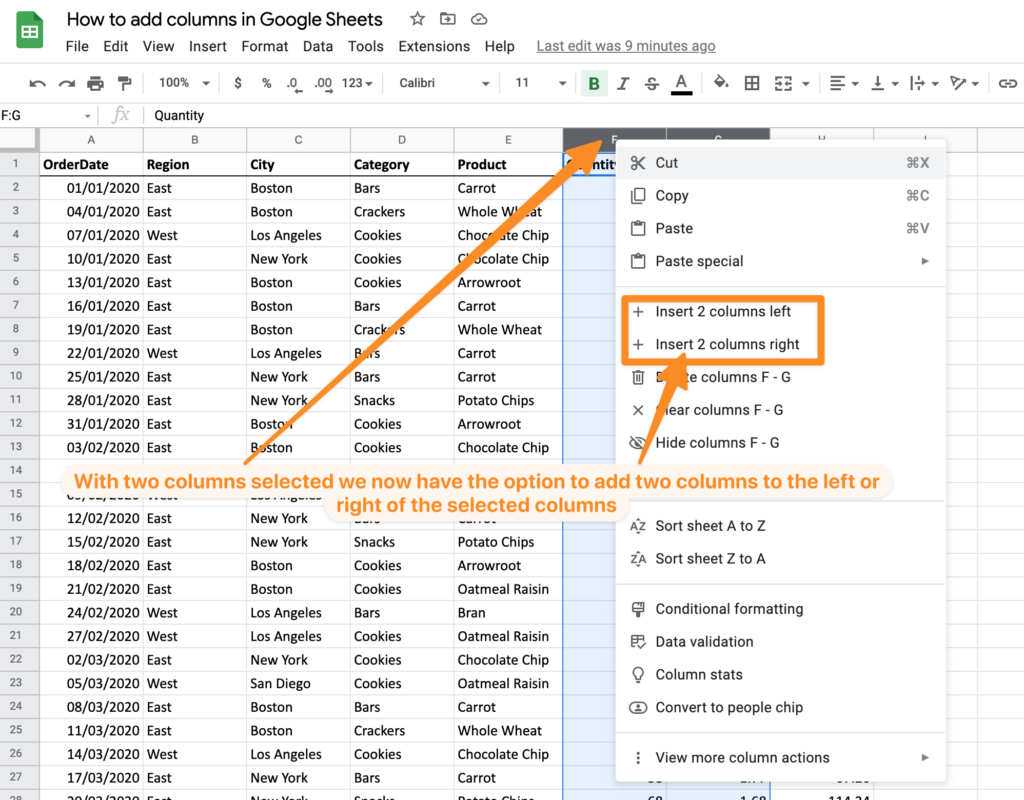
Now when you click your right mouse button at the top of the selected columns you will get the option to insert as many columns as you have selected. In our example we selected two columns so we have the option to insert two columns to the left or right of the columns we have selected.
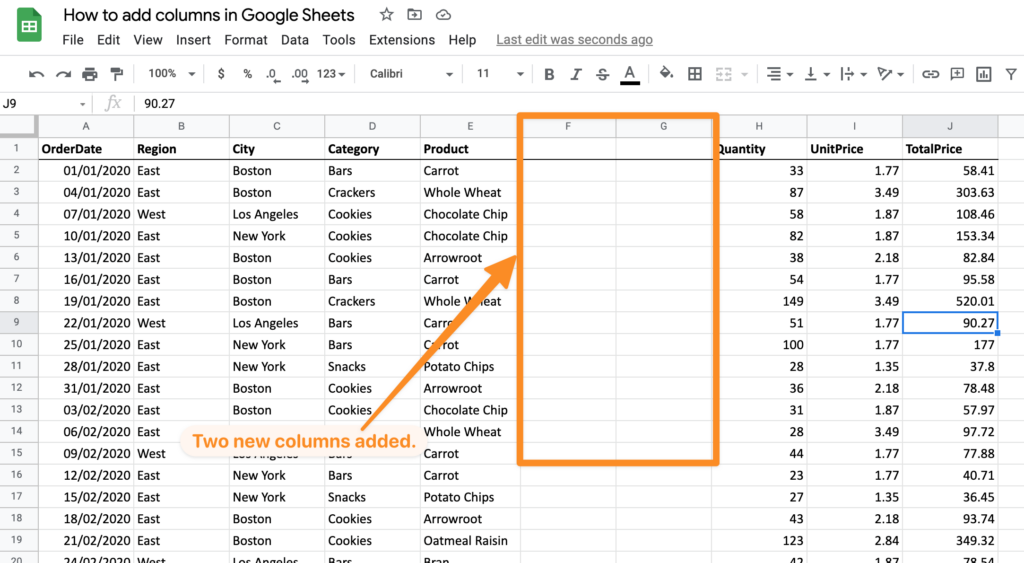
The new columns (two in our example) have now been added to the Google Sheet.
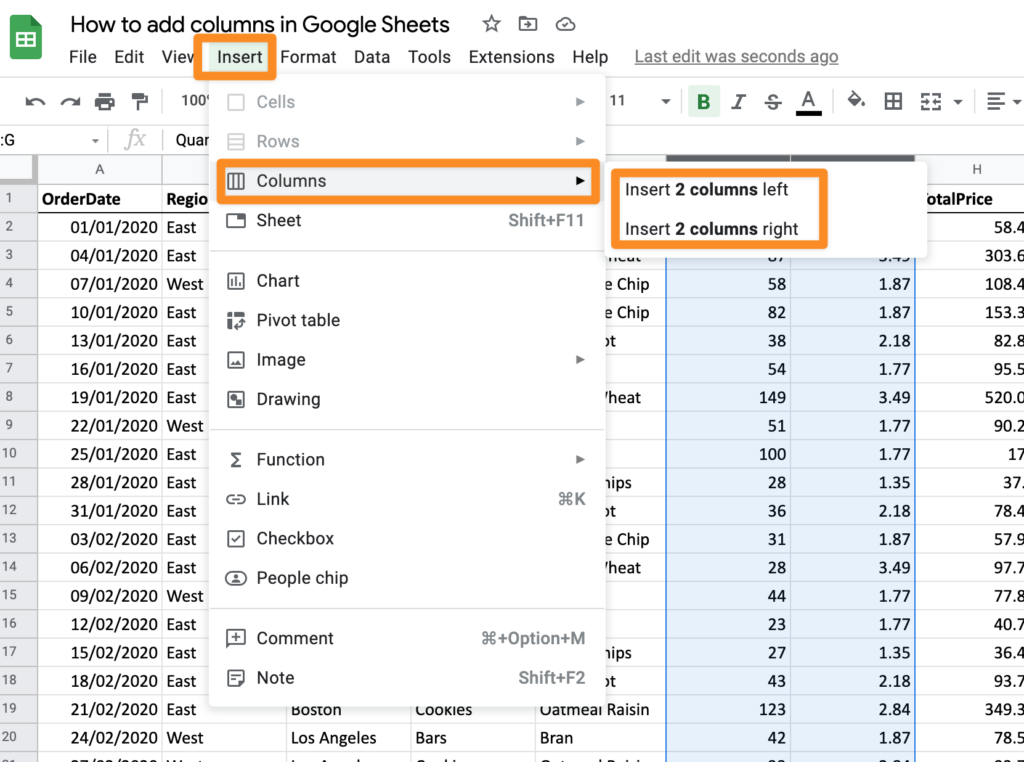
You can also do the same from the menu. Select multiple columns and go to the Insert menu, choose columns and add columns to the left or right. The number of columns available to add from the menu will reflect the number of columns you have selected (in our example, two columns).
Other resources.
- Our YouTube video with a recording of the process for how to add columns in Google Sheets.
- Official Google help page for adding columns.