A DataSherpas Quick Tip.
In this quick tip we show you how to lock cells in Google Sheets.
Locking cells is useful if you want to prevent other people that view or edit your Google Sheet from editing important information that maybe contained in the sheet. You may have values in your sheet that should never change, merged cells that are titles or headings for important data, or help boxes that you don’t want anyone to be able to edit or you may want to lock the majority of your cells and allow input in just a few. Whatever scenario, locking cells in Google Sheets is a very simple process.
We will assume you have a Google Account and know how to open up a new or existing Google Sheet.
Locking a range of cells in Google Sheets
First select the cells you want to lock by clicking your mouse into the cell to the left top of the range and then holding down your left mouse button and drag across to the final cell in the series you want to lock.
Your screen should now look similar to this.

With the cells to be locked selected, go to the “Data” menu from the top menu bar and then choose the “Protect sheets and ranges” option from the sub menu.

A new options panel should now open on the right of your Google Sheet:
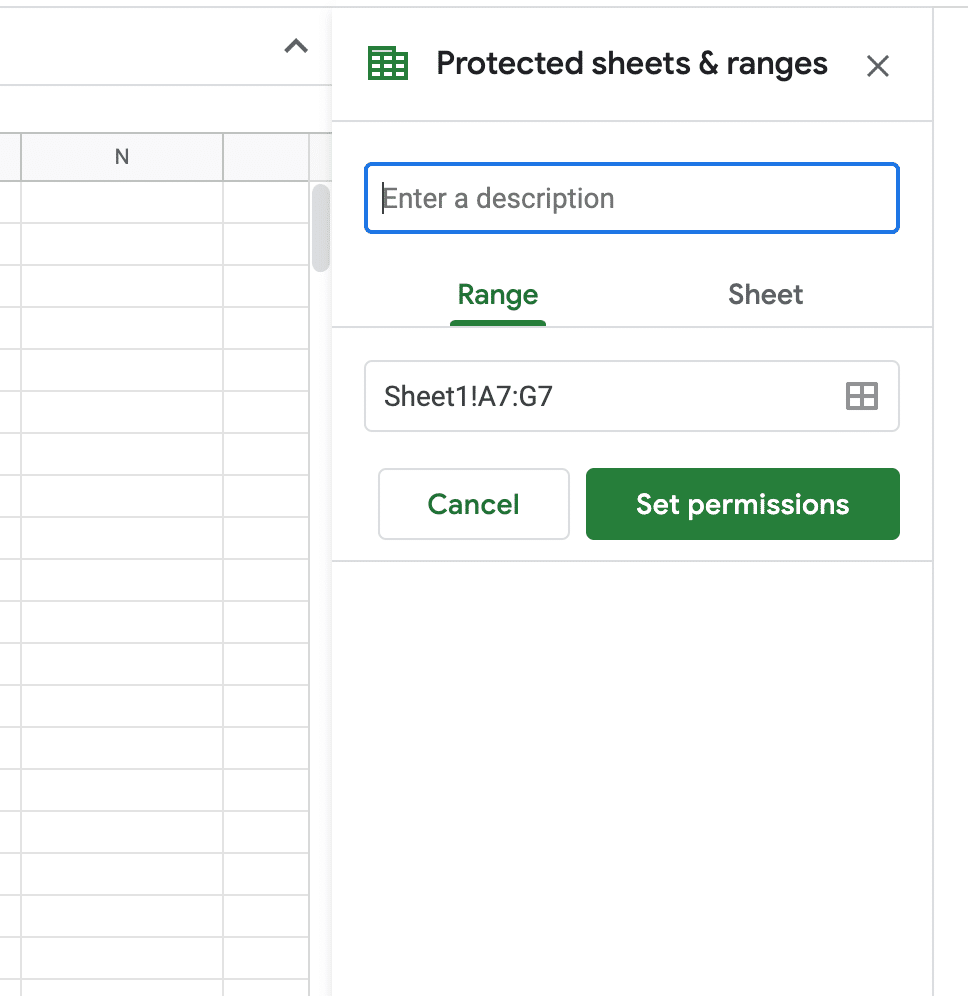
Next enter a description for the protection you want to add – this is a displayed when viewing the list of cells / ranges / sheets that are protected.
If the cells you want to lock were already selected the “Range” should be automatically be pre selected for you.
Now click “Set Permissions”
A dialogue box will now open offering you several options on how to protect the cells:
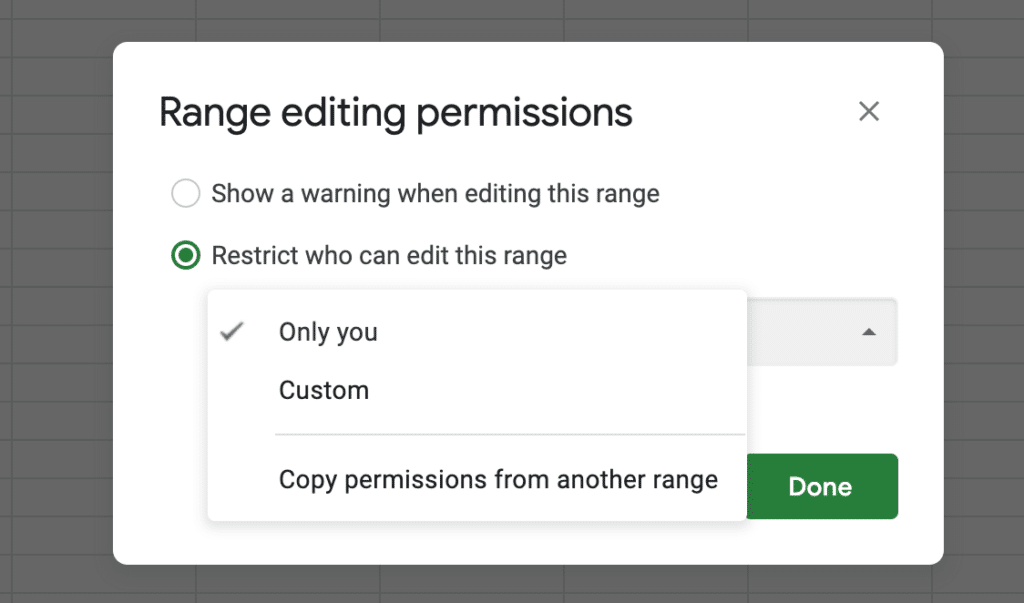
The options are:
- Show a warning when editing this range – this does not lock the cells, and other people with the correct access to the Google Sheet will still be able to edit the cells in the range you have selected, but a warning message will be displayed when changes are attempted.
- Restrict who can edit this range – Only you – This locks the cells in the range you have selected and only you will be able to edit the cells.
- Restrict who can edit this range – Custom – this option enables you to choose which people have permissions to edit the range. You can add in other people to have edit access to the cells, by email address. If you have shared the overall sheet with one or more specific users previously their names / email addresses will be displayed in the options box, otherwise you can manually add the email address into the dialogue box. (Note – any user you add here will obviously need a Google Account and be able to access the Google Sheet you are protecting).
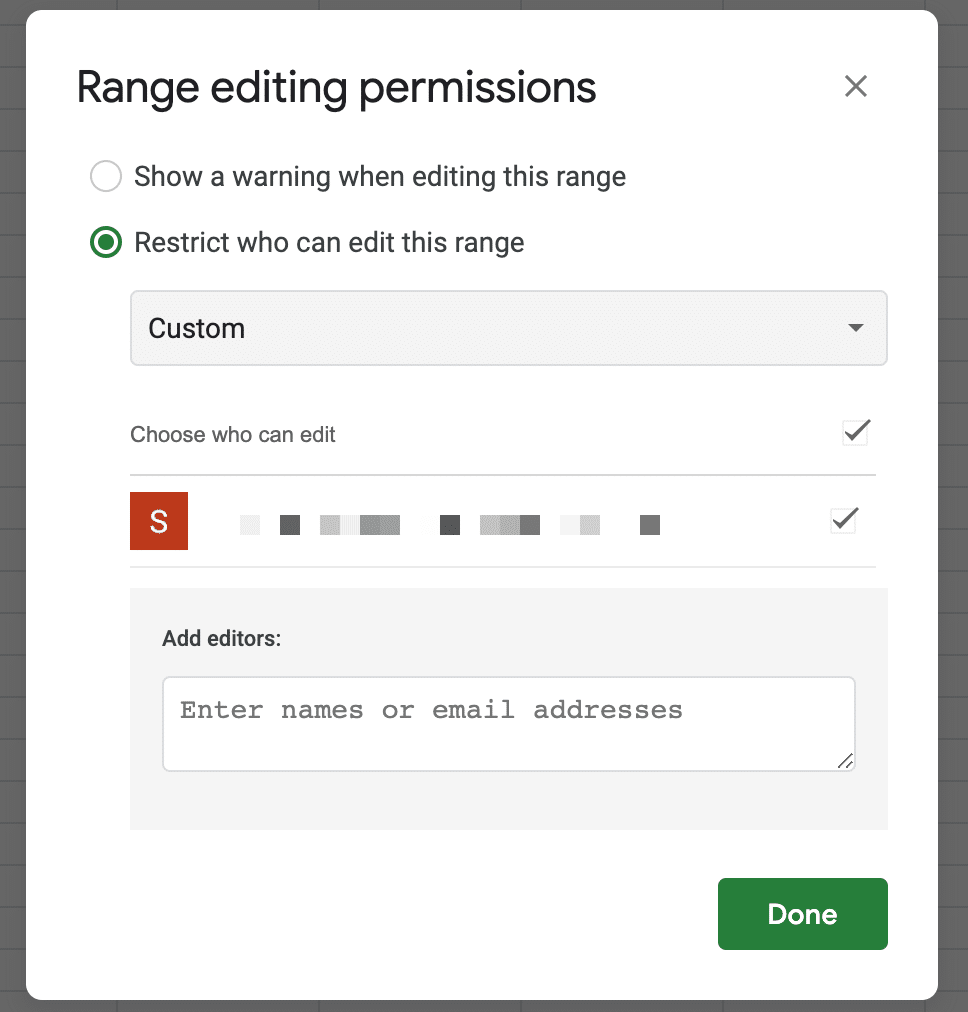
When you have finished adding people that should have access to edit the locked cells, click “Done” and the cells in your sheet will now be locked.
You will most likely have kept the edit option available for your account so you will still be able to edit the cells. Other people with access to the Google Sheet will be able to see the cells but will never be able to edit the data in the cells you selected.
Protecting the whole Google Sheet.
You can also prevent editing in the whole Google Sheet and only allow select cells within the sheet to be edit.
To do this, navigate to your Google Sheet then from the data menu choose the “Protect Sheets and ranges” option again.
Now in the options box click on the “Sheet” tab:
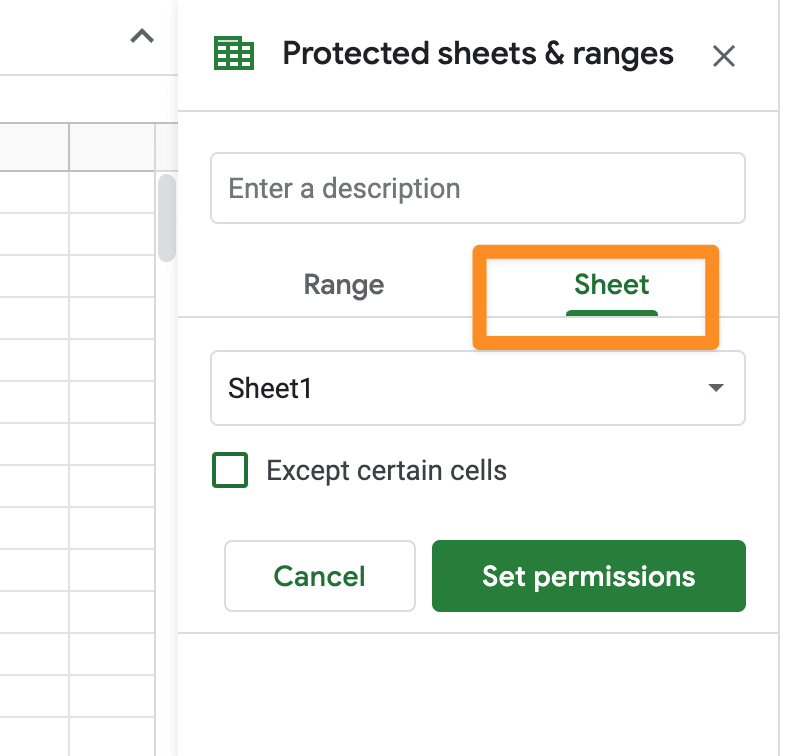
You can choose the entire sheet you want to protect from the dropdown box and then, if you want to allow editing in only certain cells, click the “Except certain cells” check box. You will then be able to select the range of cells you want to remain unlocked.
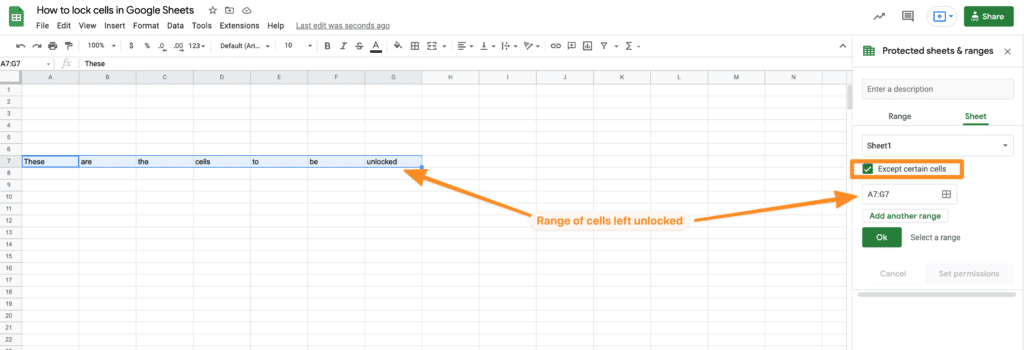
If you would like to add more cells to remain unlocked simply click the button “Add another range”
When you have finalised the ranges to remain unlocked for editing click OK. Now in the same way as you did in the previous example above you can choose which people will have edit access to the whole Google Sheet by clicking the “Set permissions” button and adding in the appropriate people who should have edit access to the range of cells to remain unlocked.
Removing the locks
There may be occasions when you want to remove the locks you have added to cells or worksheets in your Google Sheet. The process is very simple.
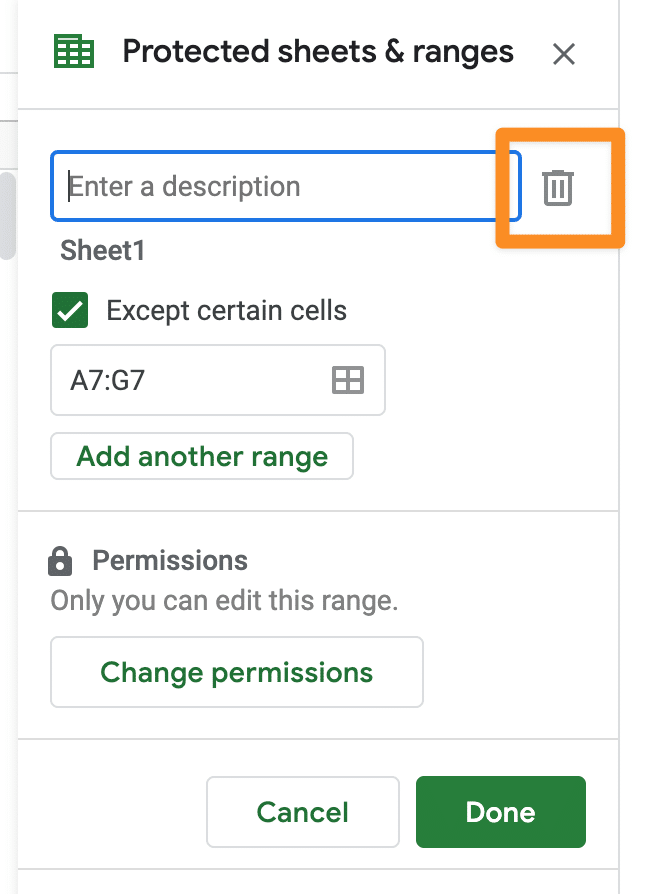
First open the Protected Sheets & ranges option panel by choosing “Protected Sheets & Ranges” submenu from the “Data” menu.
The option panel will show the ranges of cells and sheets that are protected.
Click the appropriate range / sheet.
Then click the “Bin” button.
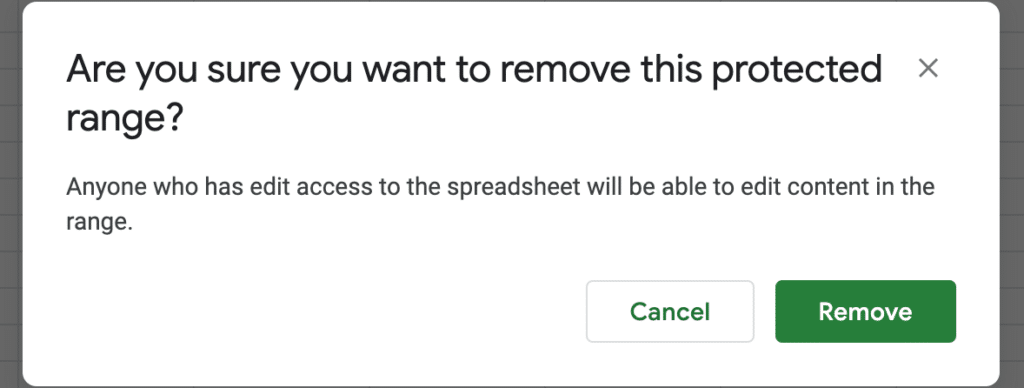
A warning box will appear to confirm your choice.
Click the “Remove” button to confirm the removal of the lock.
Summary
Adding protection for specific cells, ranges of cells or whole worksheets is a simple process,, with only a few steps, in Google Sheets. Locking cells has many benefits in terms of usability, protecting important data and ensuring important instructions are never removed.
If you have any questions about locking cells in Google Sheets, please let us know if the comments below.