How to merge and center in Excel
A DataSherpas Quick Tip.
This quick tip gives you a step by step guide for how to merge and center in Excel.
Merging and centering cells in Excel is usefu when you need to format your data in specific ways for ensuring the information contained in your spreadsheet is easy to read or presented in a specific format.
It takes just a few seconds to merge and centre in Excel and as usual Microsoft has done all the heavy lifting for you and provide nice shortcuts to make the process really simple.
We will assume you have an Excel spreadsheet ready.
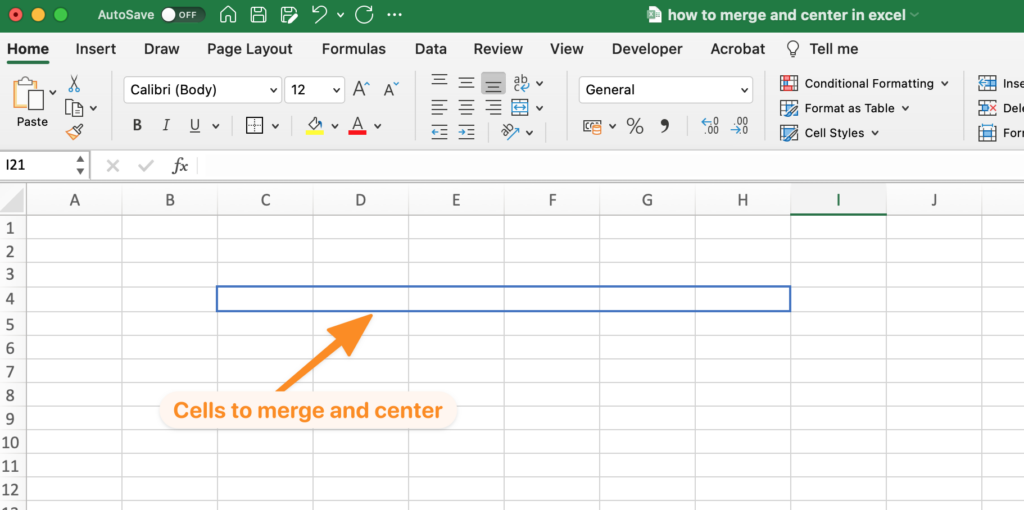
In our example below we have selected several cells in row 4 of the spreadsheet that we would like to merge and center.

Click your mouse in the first cell of the group of cells you wish to merge. Now hold down your left mouse button and drag across to the final cell you want to merge – this selects all cells that are to be merged.
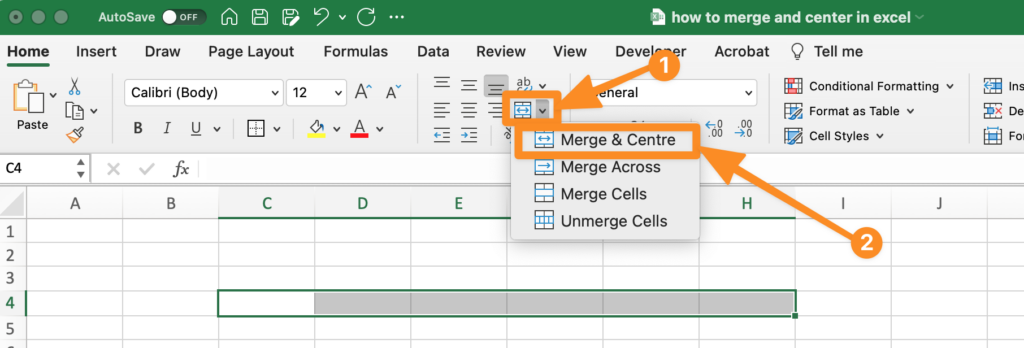
Next, from the shortcut ribbon at the top of Microsoft Excel go to the “merge” shortcut icon and from the dropdown arrow to the right of the button choose “merge and center”.

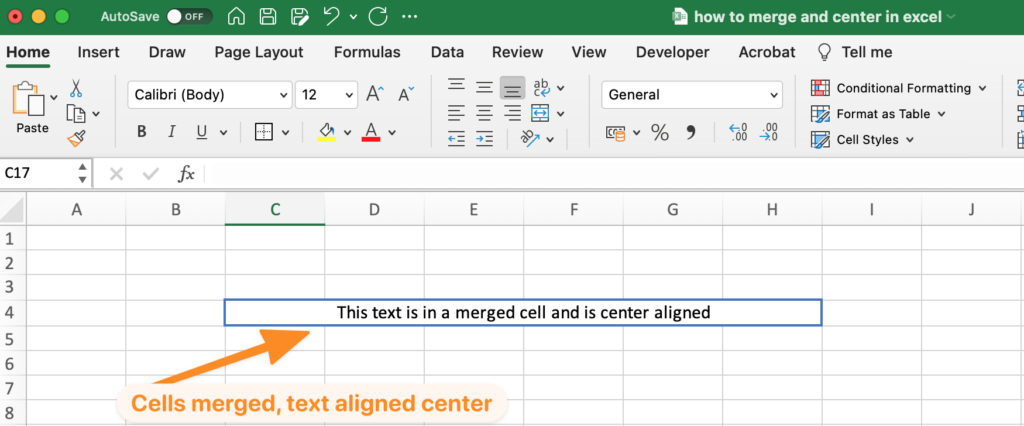
The cells you selected in the above step should now be merged to form one cell. When you add text or data into the new merged cell it should be center aligned.

You can merge cells either horizontally, vertically, or both using the technique we detail above.
Microsoft also gives us a couple of other methods to achieve the same outcome:
- After selecting your cells right mouse click in the selected cells, then choose format cells / then choose the alignment tab, horizontal alignment = center, then merge cells then OK.
- Select your cells then go to the format menu at the top of Excel, then choose cells and follow the same process as above.
It is important to note that if the cells you have chosen to merge already contain data then only the data in the top left of the range selected will remain after merging. Data in other cells will be removed.
Whatever method you chose to merge and center in Excel we hope you found this quick tip useful.
If you have any questions or need any more information, please leave a comment below or contact us via our contact page.
Notes: We use Microsoft Excel for Mac version 16.5.8 to produce this quick tip guide. If you are using other versions of Excel the location of shortcuts or menu options may vary slightly but all of the functionality we have described is available in all current Excel versions.
Other resources:
- Our Youtube video that gives a video walk through of the steps detailed in this quick tip.
- The official Microsoft documentation on merging cells in Excel.